Background
...
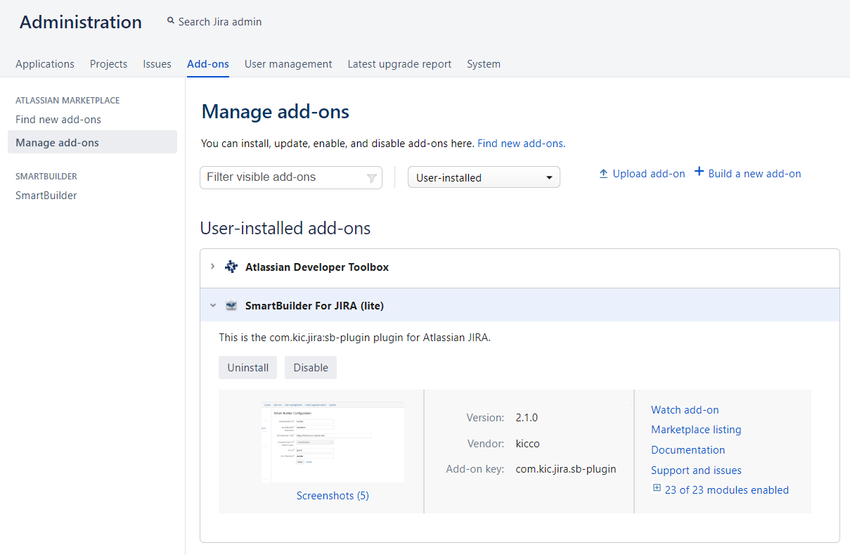
1. Find and install SmartBuilder For JIRA (lite) from Administration> Manage add-ons
2. Set the SmartBuilder information in Add-ons > SmartBuilder
3. Add SmartBuilder Type Custom Field in Issues > Custom fields
4. Connect Jira Project to SmartBuilder in Project settings
5. Set the SmartBuilder for Workflow Post function in Workflow
1. Find and install SmartBuilder For JIRA (lite) from Administration> Manage add-ons

2. Set the SmartBuilder information in Add-ons > SmartBuilder
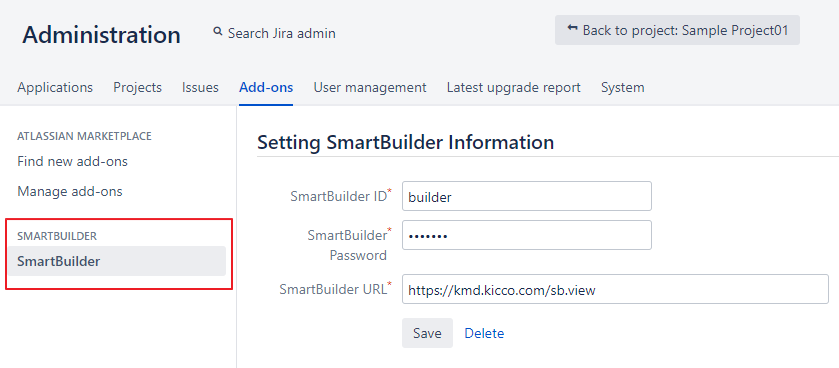

- SmartBuilder Instance : We have SmartBuilder Instance you can access.
1) url : https://kmd.kicco.com/sb.view
2) user id : builder
3) user password : builder
...
3. Add SmartBuilder Type Custom Field
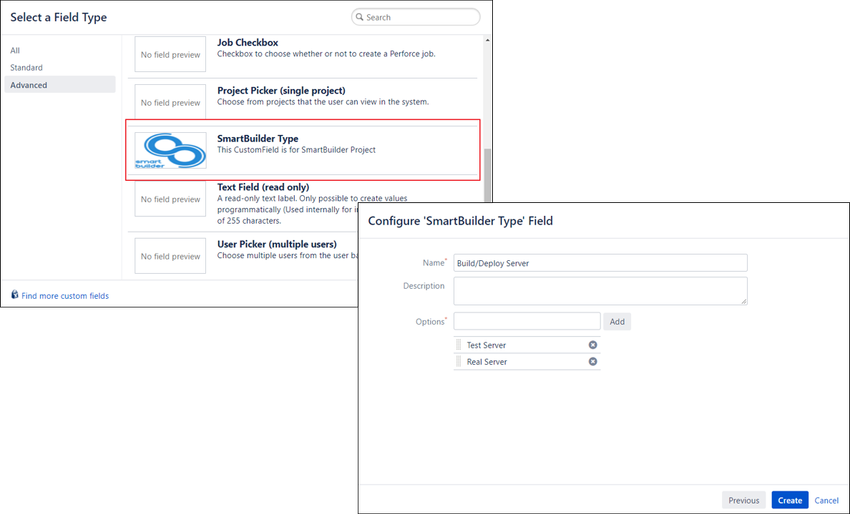
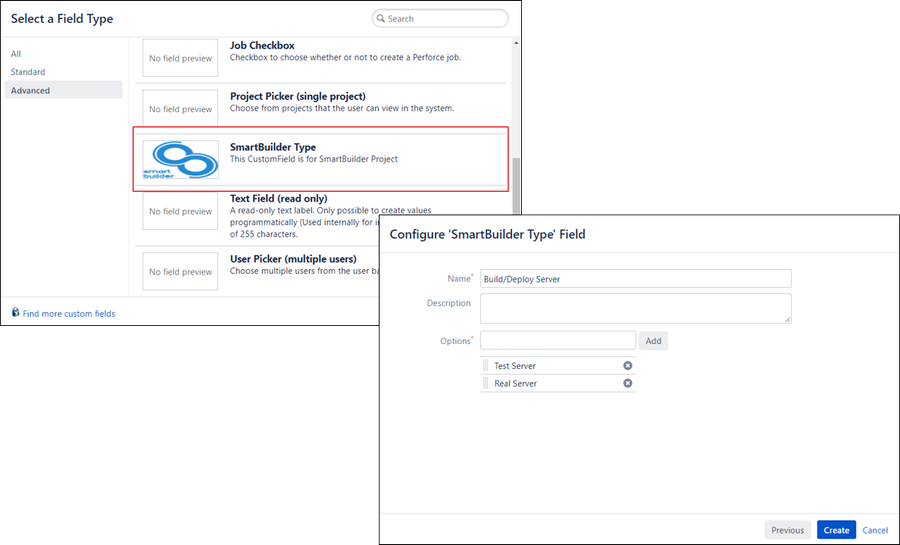
- Usage of SmartBuilder Type Custom field
1) SmartBuilder Type Custom field is used for build / deploy target server.
2) If you want to build or deploy to three servers (like Test Server, Staging Server, Real Server),
you should make three SmartBuilder Type Custom fields, and add these fields into Screen.
...
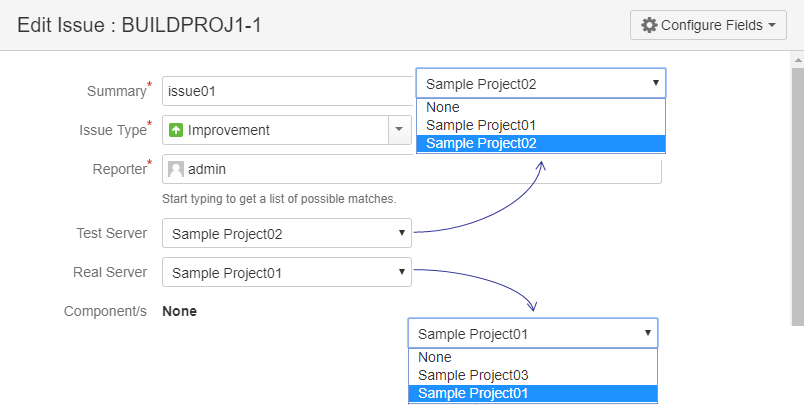
- Example of Issues Screen

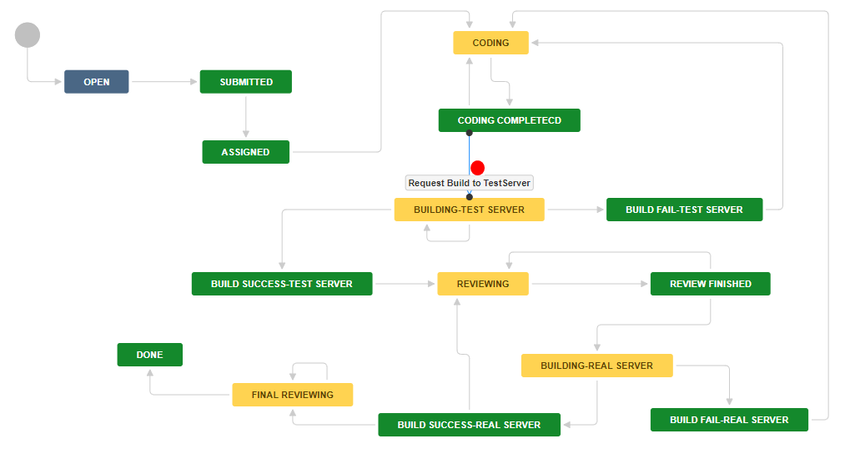
5. Set the SmartBuilder for Workflow Post Function in Workflow

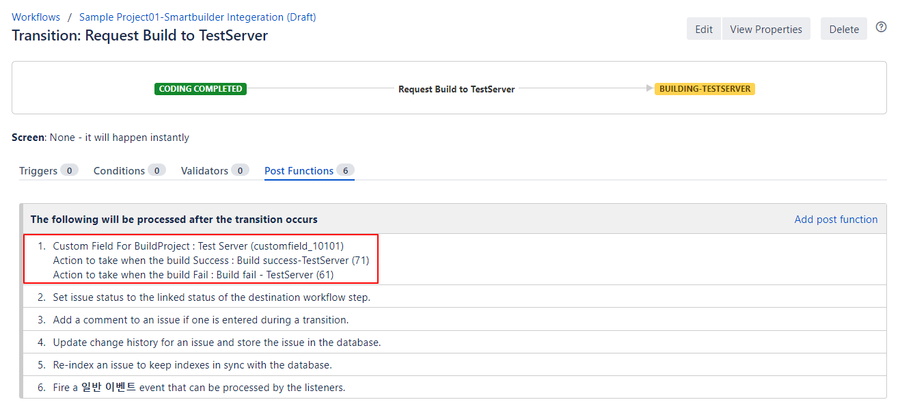
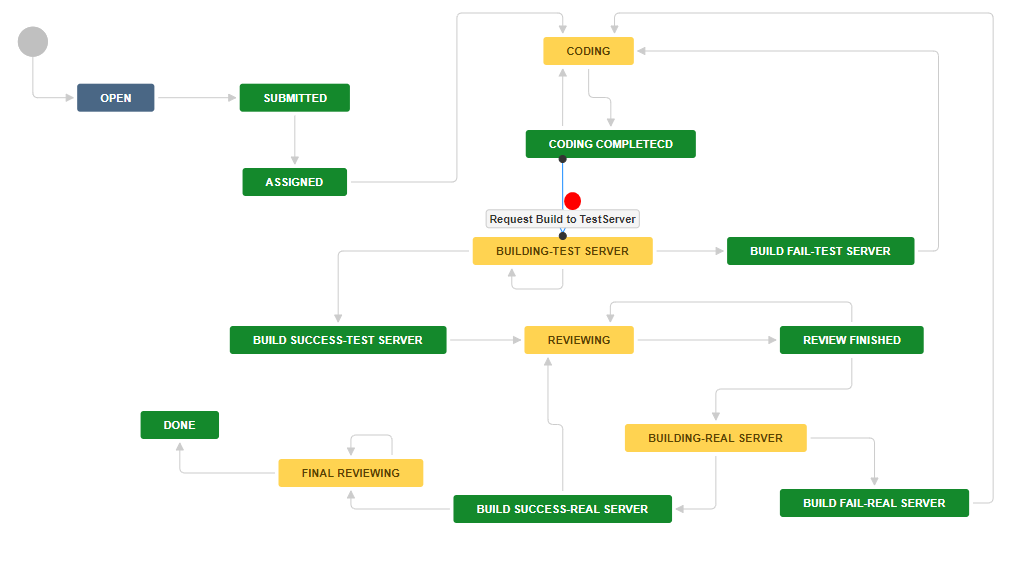
- Below workflow, we add SmartBuilder For Workflow Post function to "Request Build to TestServer" transition.
- Select SmartBuilder For Workflow Post Function


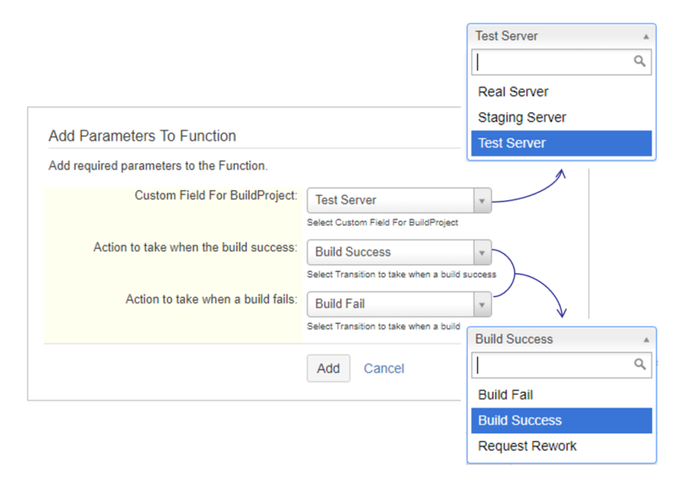
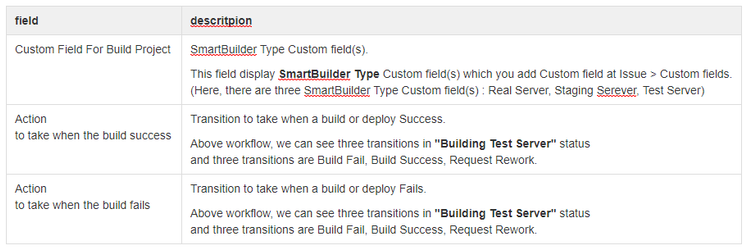
- Add Parameters To Function
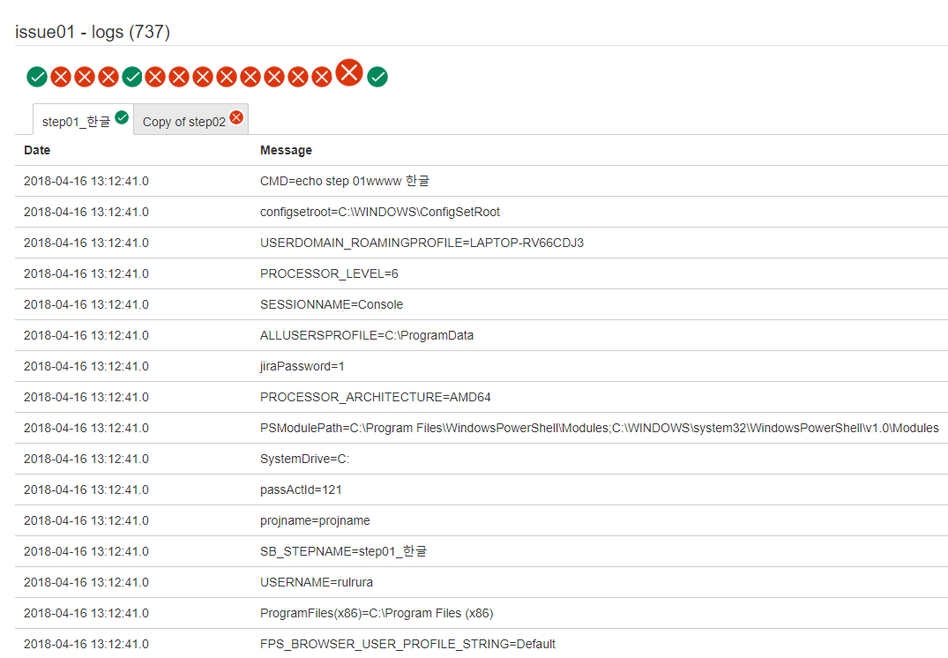
6. Build or Deploy Result


- You could see the build or deploy result by SmartBuilder at the right-below area of issue view screen.
|
|
|
| Success | Fail | Processing |


7. Build or Deploy Logs